Straightforward Steel welding & Fabrication Solutions | Based in Melton

Common structural steel sections and what they’re used for

Ever looked at a steel frame going up on a building site and wondered why all the pieces look different? Some are thick and chunky, some are hollow, and others are simple flat plates bolted into place. It’s not random. Every shape of structural steel is designed to do a specific job, in structural design, whether that’s carrying heavy loads, spanning open spaces, or keeping an entire structure stable.

We work with structural steel every day, so we’ve put together a clear guide to the most common steel types and shapes you’ll see on construction projects, what they’re used for, and why engineers choose them.

Why does structural steel come in different shapes

Steel might look simple at first glance, but it’s one of the most important construction products used in modern buildings. The shape of a section has a huge impact on how it performs. The right profile can carry more weight, resist bending, or stay stable under pressure, often while using less material.

That’s why structural steel sections are rolled, fabricated, or sometimes cold-formed into specific forms. Instead of using solid blocks of metal everywhere (which can get heavy and expensive), engineers place the steel where it’s needed most within the shape of the section.

The result? Stronger structures, lighter frames, and more efficient buildings.

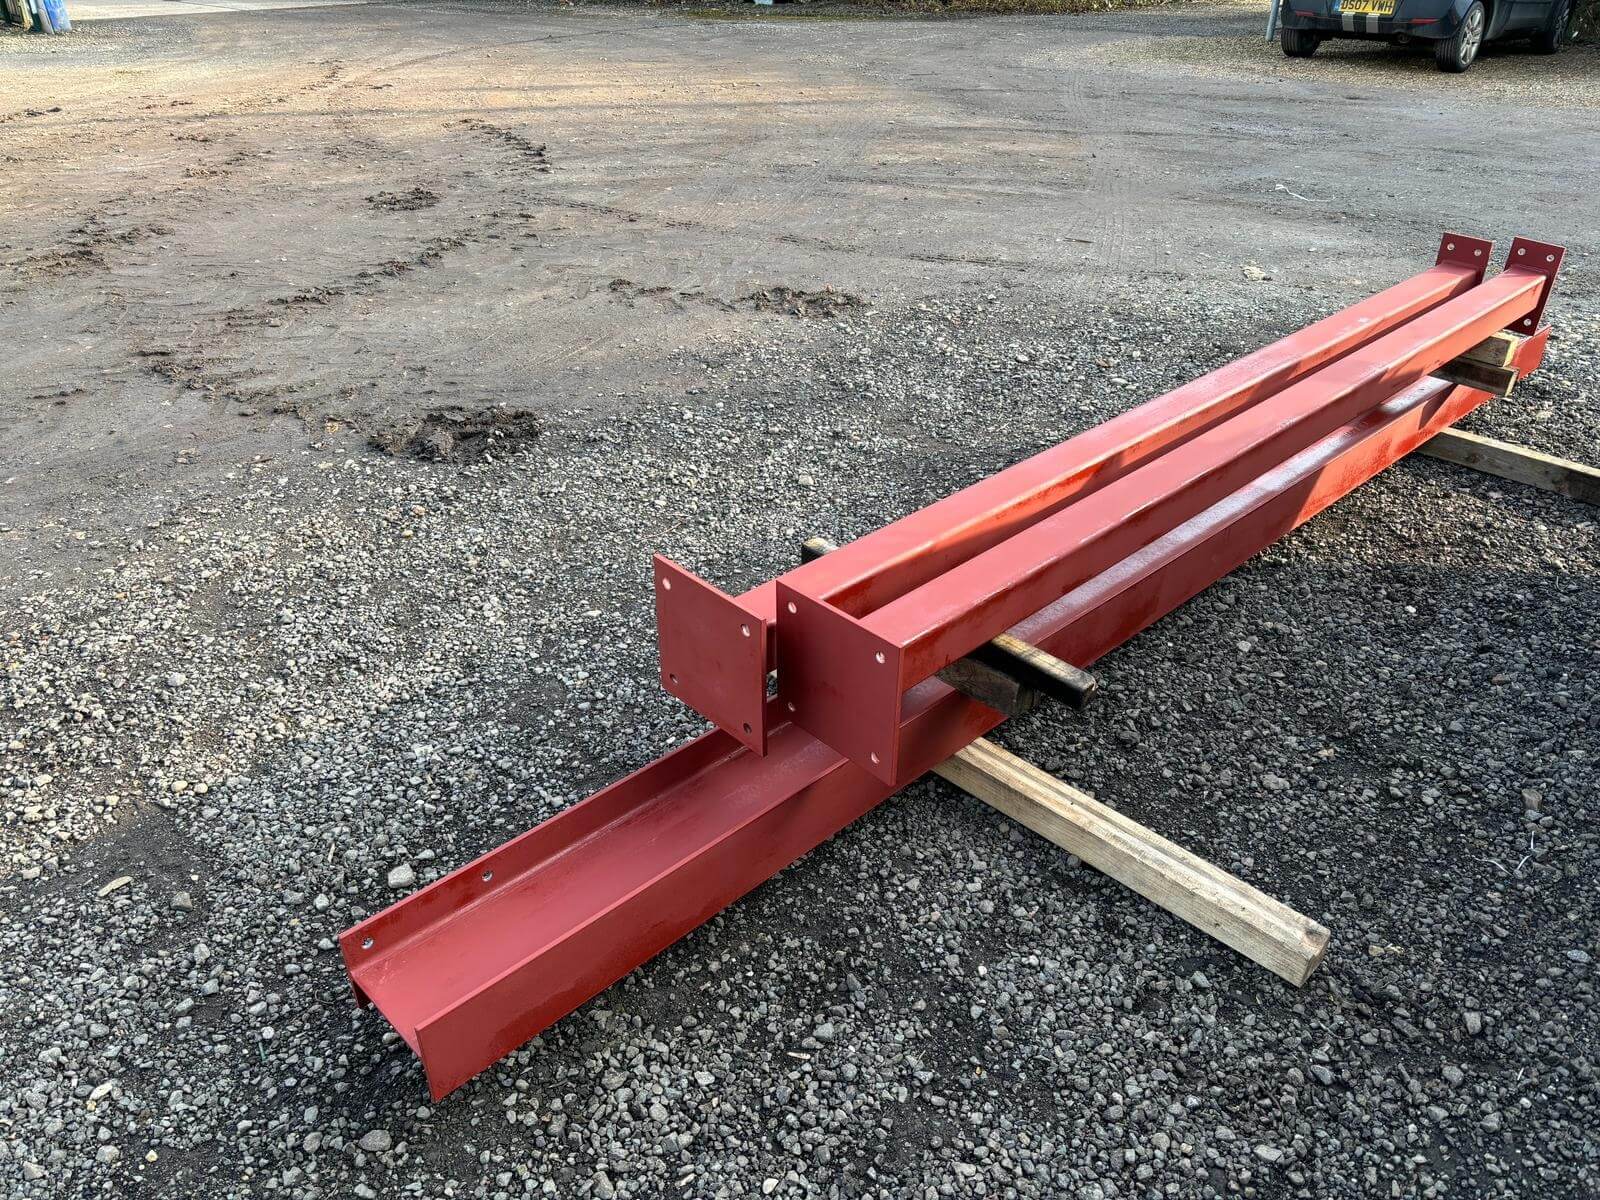
Universal beams, often called I-beams or RSJs, are some of the most recognisable structural steel sections. Their I-shaped profile concentrates steel in the top and bottom flanges, where bending forces are highest, while the thinner centre web keeps the weight down.

You’ll usually see them supporting floors, roofs, and large openings.

They’re commonly used for:

  • Load-bearing walls removed in extensions
  • Open-plan layouts
  • Commercial floor structures
  • Long spans in structural floors and roofs

Because they can carry serious loads across wide distances, a single universal beam can often replace several supporting walls, opening up the space without compromising strength.

While beams are designed to span horizontally, universal columns are built to handle vertical loads. Their H-shaped profile is thicker through the centre, helping them transfer weight directly down into the foundations.

They’re widely used in steel-framed buildings where multiple storeys need strong vertical support.

You’ll often see universal columns used in:

  • Multi-storey building frames
  • Mezzanine floors
  • Warehouse structures
  • Commercial steel skeletons

If something needs to stand firm under constant pressure, there’s a good chance a universal column is doing the job.

Parallel flanged channel sections, usually called C-sections, are open steel profiles that are lighter than beams but still strong enough for many structural tasks.

Their shape makes them easy to fabricate, drill, bolt, or weld, which is why they’re popular for secondary steelwork and framing.

Common uses include:

  • Steel framing systems
  • Agricultural buildings
  • Solar panel structures
  • Transport and plant supports

They’re quick to install and versatile, which helps keep fabrication and installation efficient on-site.

Angle sections might look simple, but they’re incredibly useful. As the name suggests, they’re rolled into an L-shape, making them ideal for connecting different steel components.

You’ll often find them working quietly in the background, tying structural elements together.

Typical uses include:

  • Brackets and structural connections
  • Supporting frames and edges
  • Reinforcing steelwork joints
  • Secondary support structures

Sometimes, two angle sections are paired together to create a stronger built-up section, depending on the loads involved.

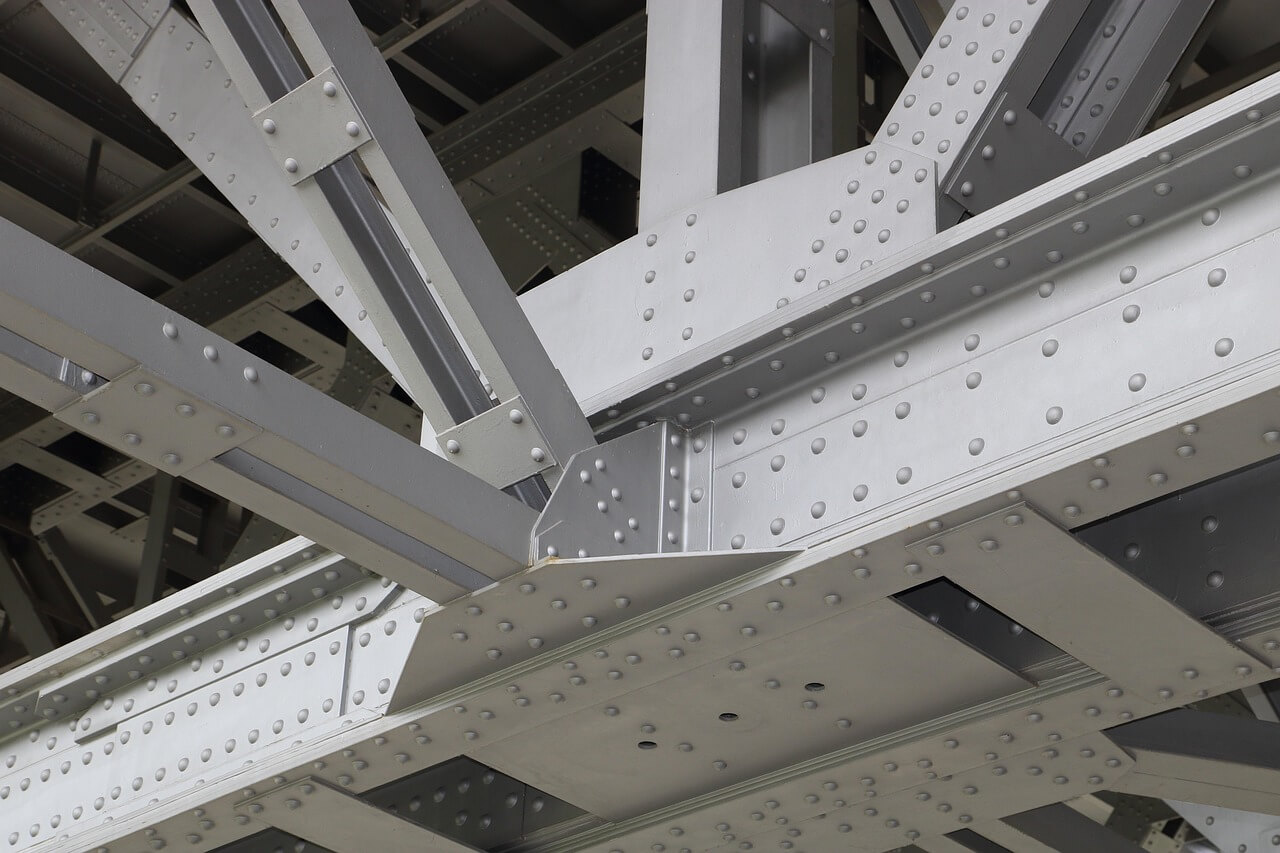
Steel plates are essentially flat sheets of structural steel and are one of the most versatile steel products used in fabrication, but don’t underestimate them. They’re often the pieces that make everything else work.

Fabricators use plates for:

  • Base plates under columns
  • Gusset plates connecting beams and braces
  • Stiffeners strengthening beams
  • Load distribution points

Because they can be cut, drilled, and welded into almost any configuration, steel plates act as the connectors that tie an entire structure together.

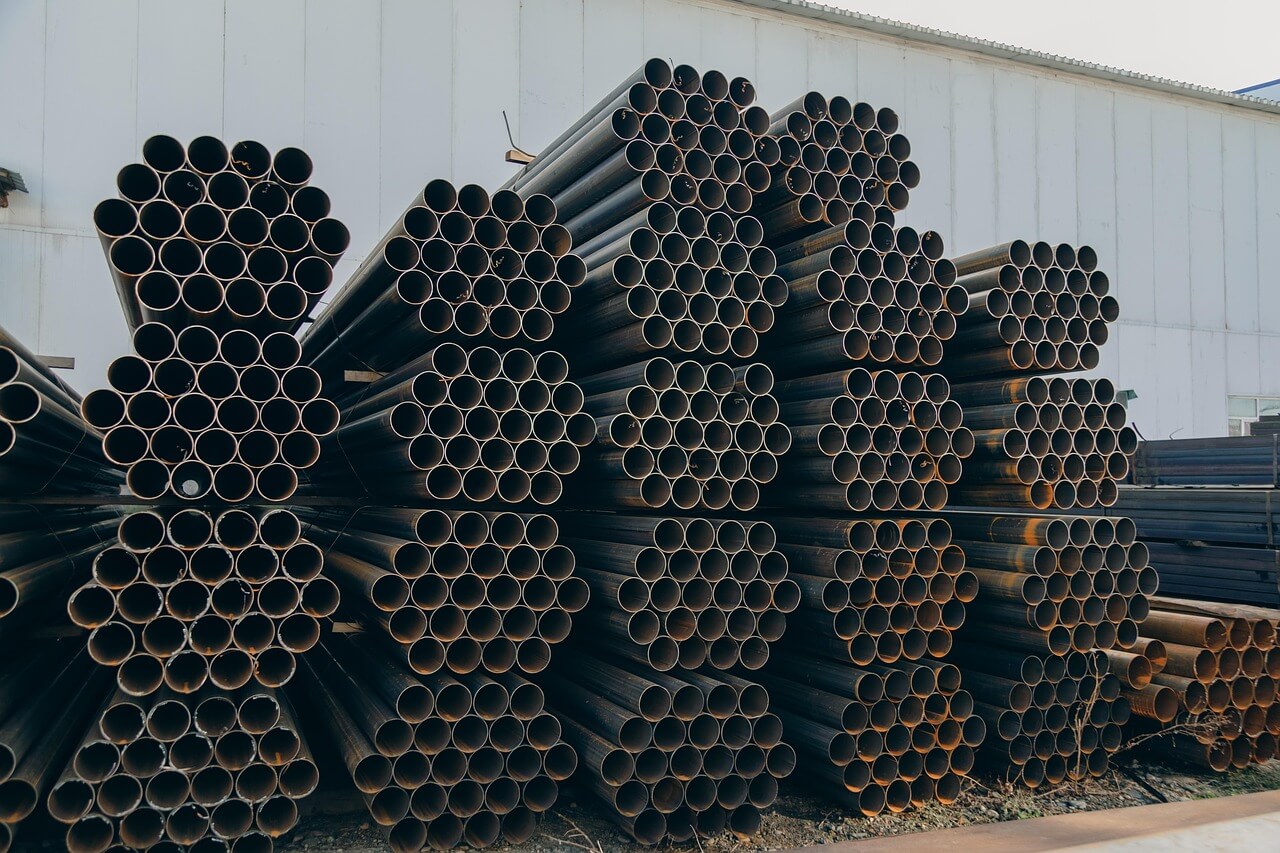
Hollow steel sections are tubular steel profiles with a hollow centre. Unlike open sections, the steel is distributed evenly around the outside, which gives them excellent strength in multiple directions.

They come in three main forms:

  • Square hollow sections (SHS)
  • Rectangular hollow sections (RHS)
  • Circular hollow sections (CHS)

Because of their balanced shape, hollow sections perform particularly well under compression and twisting forces.

You’ll often see them used in:

  • Steel building frames
  • Architectural structures
  • Walkways and bridges
  • Marine and outdoor structures

They’re also efficient, strong, and without needing excessive material, which helps control both weight and costs.

Square and rectangular hollow sections are especially popular where both structure and appearance matter.

Their clean lines make them a favourite for:

  • Exposed steel frames
  • Columns in modern buildings
  • Structural supports in commercial fit-outs
  • Residential steel features

In many projects, the steelwork is deliberately left visible, and these sections provide the strength while still looking neat and consistent.

Circular hollow sections distribute forces evenly around their shape, which makes them particularly good at handling loads coming from different directions.

Because of this, they’re often used in structures exposed to wind, movement, or changing loads.

Typical applications include:

  • Structural columns
  • Bridge supports
  • Pylons and towers
  • Public architectural structures

Add galvanising or protective coatings, and they’re capable of lasting for decades even in challenging environments.

Structural steel types

Most structural steel used in construction is mild steel, also known as low-carbon steel. Common examples include Structural Steel S235 and Structural Steel S275, which are widely used in general building applications. It provides a good balance of strength, flexibility, and ease of fabrication, which is why it’s widely used across the industry.

When projects require higher performance, engineers might specify:

  • High-strength low-alloy steel for increased strength with less material
  • Weathering steel that forms a protective rust layer that resists corrosion
  • Stainless steel for environments where hygiene, appearance, or exposure is important

All structural steel must meet recognised standards such as Eurocode 3, EN 1993-1-1, and EN 10025. These requirements ensure products meet the Construction Products Regulations and wider EU legislation for structural steel. In simple terms, what’s designed on paper performs exactly as expected on site.

Why choosing the right steel section matters

Every beam, column, plate, or hollow section plays a part in how a structure behaves. Choosing the right section means loads travel efficiently through the structural steelwork, foundations stay sensible in size, and construction runs smoothly.

Get it wrong, and you either end up over-engineering the structure or solving problems further down the line.

From iconic structures like the Empire State Building to everyday home extensions and warehouses, structural steel keeps proving the same point: when it’s designed and fabricated properly, it just works.

Need structural steel fabrication for your project?

Whether it’s RSJs, columns, hollow sections, or bespoke fabricated steel components, working with experienced steel fabricators makes all the difference. Properly specified steelwork ensures your structure performs exactly as intended, safely, efficiently, and is built to last.

If you’re planning a project and need reliable structural steel fabrication, it’s always worth speaking to professionals who understand the practical side of how these sections perform in the real world.


Ultimate Tensile Strength Explained Simply

How much can your steel take before it snaps?

Tired of scratching your head over metal specs that sound like physics homework? Ultimate Tensile Strength (UTS) is the number that tells you how much pulling force your steel, or any metal, can take before it says “enough” and snaps. We’re bespoke metalworkers who’ve bent, welded and stress-tested enough steel to know: ignoring UTS is like building a gate that buckles the first time someone leans on it.

Whether you’re crafting a sturdy garden arch, reinforcing a workshop frame, or speccing materials for a client project, UTS helps you pick winners. Let’s break it down like we’re chatting over a brew in the workshop — clear, practical, and with a dash of real-world grit.

What Exactly is Ultimate Tensile Strength?

Imagine grabbing a steel bar at both ends and pulling until it breaks – like a grim tug-of-war. UTS is the maximum stress (pulling force) that bar can handle right before it rips apart. It’s not about bending or stretching a bit; it’s the absolute limit where failure happens.

Engineers call it the “peak of the stress-strain curve”, but forget the graphs for now. In plain terms, UTS measures a material’s breaking point under tension (pulling forces), like suspension cables, lifting straps, or a railing someone’s hanging off.

Measured in:

  • MPa (Megapascals) or N/mm² (same thing, UK/Europe favourite).
  • psi (pounds per square inch) for our US cousins.

Typical values? Mild steel clocks in at 400-550 MPa. That’s enough to hoist a small car without blinking. Aluminium? More like 200-500 MPa – lighter but not as brute-strong.

Why care? High UTS means safer, longer-lasting builds. Low UTS? Potential disaster waiting for the wrong load.

UTS vs Yield Strength: Don’t Mix Them Up

Here’s where specs trip people up. UTS isn’t the same as yield strength – think of yield as the “oops, permanent bend” point, while UTS is full-on snap city.

  • Yield Strength: Stress where the metal deforms plastically (won’t spring back). For mild steel, around 250 MPa. Push past this, and it’s stretched for good.
  • UTS: The max before fracture. Higher than yield, but once you hit it, game over.

Picture chewing gum: yield is when it starts stretching weirdly; UTS is when it tears. In builds, design to stay well under yield for safety – UTS is your red-line warning.

Why UTS is a Game-Changer for Metal Projects

UTS isn’t abstract lab stuff; it’s your project’s safety net. Get it wrong, and things fail spectacularly.

Key uses:

  • Construction: Load-bearing beams, RSJs, balcony supports. Ensures they don’t snap under weight.
  • Bespoke Metalwork: Gates, railings, frames – UTS picks steel that handles wind, people, and time.
  • Manufacturing: Machine parts, tools – high UTS fights wear and strain.
  • Aerospace/Auto: Balances strength with weight; titanium hits 900+ MPa for a reason.

Factors affecting UTS:

  • Temperature: Cold makes steel brittle (UTS drops); heat softens it.
  • Thickness: Thinner sections stretch more before breaking.
  • Alloys/Treatments: Heat-treated or alloyed steel boosts UTS big time.

Real talk: Always factor in a safety margin (e.g., design for 50-60% of UTS) to cover real-world surprises like impacts or corrosion.

How Do They Test UTS? (The Pull-Test Lowdown)

No magic – it’s brute force in a lab. Here’s the standard tensile test:

  1. Prep the Sample: Dog-bone shaped bar (wider ends, narrow middle) for even stress.
  2. Clamp It: Universal testing machine grips both ends.
  3. Pull Slowly: Applies steady force while sensors track stretch (strain) and load.
  4. Record Data: Plot stress vs strain curve. Peak = UTS. Then it necks (thins) and snaps.
  5. Gadgets Involved: Extensometers measure elongation; strain gauges catch every twitch.

Whole thing takes minutes. Results go on spec sheets – check yours from suppliers like us for accurate numbers.

Fun fact: Ductile metals (like mild steel) stretch 20-30% before breaking; brittle ones (cast iron) shatter quick.

UTS of Everyday Metals: Quick Reference Table

Not all metals are equal. Here’s a rundown of common ones we use in bespoke work:

Metal/AlloyUTS (MPa)Best ForNotes
Mild Steel400-550Gates, frames, general buildsCheap, weldable, rusts if unprotected
High-Strength Steel800-1200+Heavy lifts, beamsTougher, pricier
Stainless Steel (304)500-700Outdoor railings, kitchensCorrosion-resistant bonus
Aluminium (6061)240-310Lightweight frames, claddingHalf steel’s weight
Brass300-500Fittings, decorPretty, corrosion-proof
Copper200-250Plumbing, electricsSoft but conductive
Titanium900-1200High-end, aerospace-inspiredStrength-to-weight king

Mild steel’s our daily driver – balanced strength without breaking the bank. Stainless steps up for wet or salty spots.

The UTS Formula: Don’t Panic, It’s Simple

UTS = Maximum Load (Force) ÷ Original Cross-Sectional Area

Or in symbols: σu=FmaxA0σu=A0Fmax

F_max is peak force (Newtons), A_0 is starting area (mm²). Result? MPa.

Example: Steel bar (10mm x 10mm = 100mm² area) snaps at 50,000N? UTS = 500 MPa. Easy when you see it.

Real-World Examples: UTS in Action

  • Garden Gate: Mild steel frame (450 MPa UTS) handles swinging kids and wind gusts. Swap to aluminium? Might sag sooner.
  • Workshop Crane: High-strength steel (900 MPa) lifts engines safely. Mild steel? Risky overkill.
  • Balcony Railing: Stainless (600 MPa) resists pulls and weather – no rust worries.
  • Fail Case: Cheap non-galvanised mild steel chain (low UTS margin) snaps under tow truck strain. Proper spec? No drama.

We’ve seen dodgy UTS choices lead to warped gates and collapsed shelves. Lesson: Match UTS to your max expected load.

Boosting UTS: Treatments and Tricks

Plain steel good? Upgrade it:

  • Heat Treatment: Quenching/tempering pushes mild steel to 800+ MPa.
  • Alloying: Add chromium (stainless) or vanadium for strength spikes.
  • Cold Working: Rolling/stretching aligns grains, hiking UTS 20-50%.
  • Coatings: Doesn’t change UTS but prevents corrosion weakening.

For bespoke jobs, we spec heat-treated grades for high-stress bits.

Common UTS Myths Busted

  • Higher UTS = Always Better? Nope – too brittle might snap without warning. Balance with ductility.
  • UTS for Compression Too? No, it’s tension-specific. Compression uses different tests.
  • Steel Always Tops? Aluminium’s lower UTS but shines in weight-sensitive spots.
  • Home Test It? Don’t. Leave to labs. Guessing leads to oops moments.

Why Bespoke Matters for UTS

Off-the-shelf metal’s fine, but custom work needs precise UTS matching. We cut, weld and finish to your load specs – mild for budget gates, high-strength for load-bearers. No waste, no weak links.

Got a project? Chat UTS with us. We’ll recommend grades that pull their weight, literally.

Wrapping It Up: Know Your Limits

UTS boils down to one question: “How much pull before snap?” Master it, and your metalwork lasts. Mild steel’s 400-550 MPa sweet spot for most jobs; scale up for extremes.

Next time you spec steel, check that UTS figure first. It’s the difference between “built to last” and “back to the drawing board”. Need high-UTS stock cut to size? We’ve got you – tough as nails, priced right.

Ferrous vs Non-Ferrous Metals: Iron In or Out?

Ever picked up a magnet near your scrap pile and watched half the bits jump while the rest sit smugly ignoring it? Welcome to the ferrous vs non-ferrous divide — the great metal family split that decides if your project rusts, shines, or costs the earth. As bespoke metalworkers knee-deep in steel every day, we’ve used both for everything from burly gates to sleek handrails. Here’s the no-fluff guide to tell them apart, why it matters, and which to pick for your next build.

What Makes a Metal Ferrous?

“Ferrous” just means it’s got iron in the mix — usually a big chunk. Iron’s the cheap, tough backbone of construction, but it comes with baggage.

Key traits:

  • Magnetic: Stick a fridge magnet to mild steel? Yep. Cast iron pan? Clings like glue.
  • Rust Magnet: Iron + water + oxygen = reddish-brown corrosion that eats away strength.
  • Heavy & Strong: High density, excellent tensile strength (UTS) for load-bearing.
  • Cheap & Weldable: Easy to source, form, and join.

Common ferrous suspects:

  • Mild steel (your gates, frames).
  • Stainless steel (rust-resistant thanks to chromium).
  • Cast iron (heavy-duty pans, engine blocks).
  • Tool steels (hardenable for blades).

Ferrous shines where brute strength trumps shine — think structural beams or workshop tools.

What’s Non-Ferrous All About?

No iron here — lighter, prettier, and rust-proof (mostly). These are the premium performers for corrosion hell, like coasts or kitchens.

Hallmarks:

  • Non-Magnetic: Magnet slides right off aluminium or copper.
  • Corrosion-Resistant: Natural oxide layers protect aluminium; copper patinas gracefully.
  • Lighter Weight: Aluminium’s a third steel’s heft — great for portability.
  • Softer, Pricier: Lower UTS typically, but excellent machinability and conductivity.

Big players:

  • Aluminium (cladding, frames).
  • Copper (pipes, wiring).
  • Brass/bronze (fittings, decor).
  • Titanium (high-end, lightweight strength).
  • Zinc (galvanising baths).

Non-ferrous rules wet, electrical, or aesthetic jobs — no rust worries.

Head-to-Head: Ferrous vs Non-Ferrous Showdown

Side-by-side for project planning:

FeatureFerrous (e.g., Mild Steel)Non-Ferrous (e.g., Aluminium)
Iron ContentYes (magnetic)No (non-magnetic)
Rust RiskHigh (needs paint/galvanising)Low (self-protecting)
UTS (MPa)400-1000+200-500 (higher for alloys)
DensityHigh (heavy)Low (lightweight)
CostLowHigher
WeldabilityExcellentVariable (needs special methods)
ConductivityDecentExcellent (Cu, Al)
Best UsesStructures, tools, gatesWiring, marine, decor

Ferrous wins on strength and price; non-ferrous on longevity in harsh spots.

Ferrous Metals Deep Dive

Mild Steel

Everyday hero: 99% iron + carbon. UTS 400-550 MPa. Rusts fast outdoors — galvanise or paint it. Our go-to for frames and gates.

Stainless Steel

Ferrous with 10%+ chromium forming a rust-blocking film. UTS 500-700 MPa. Grades like 304 (general) or 316 (marine). Pricey but forever.

Cast Iron

Poured molten, brittle but vibration-dampening. UTS 200-400 MPa. Think manhole covers — heavy, cheap, rusts.

Alloy/Tool Steels

Carbon + extras like manganese. Heat-treat for 1000+ MPa UTS. Drills, springs — tough cookies.

Pros: Cheap, strong, recyclable. Cons: Rust city without protection.

Non-Ferrous Metals Spotlight

Aluminium

Light (2.7 g/cm³), UTS 200-500 MPa (alloys boost it). Self-heals with oxide skin. Frames, cladding — anodise for extra shine.

Copper

Reddish, UTS 200-250 MPa. Super conductive, antimicrobial. Pipes, roofs — develop green patina over time.

Brass (Copper + Zinc)

UTS 300-500 MPa. Corrosion-resistant, machinable. Door handles, fittings — golden glow.

Bronze (Copper + Tin)

Tougher than brass, UTS 350-600 MPa. Bells, propellers — seawater champ.

Titanium

UTS 900+ MPa at aircraft weight. Pricey but bombproof. Implants, bikes — future-proof.

Pros: No rust, lightweight, pretty. Cons: Softer, costs more.

Why Does This Split Matter for Your Project?

Picking wrong? Disaster. Ferrous for a coastal railing? Rust buckets in a year. Non-ferrous indoors? Overkill cash burn.

Scenarios:

  • Outdoor Gates/Railings: Galvanised mild steel (ferrous) — strong, affordable. Stainless if salty air.
  • Kitchen Splashbacks: Aluminium or stainless — hygiene, no rust.
  • Electrical Boxes: Copper fittings — conductivity rules.
  • Decorative Features: Brass — bling without tarnish.
  • Bridges/Heavy Lifts: High-strength steel — UTS king.

Magnets are your quick test: sticks = ferrous (protect it); slides = non-ferrous (expose freely).

Testing & Identifying: Magnet Trick + More

  • Magnet Test: Ferrous attracts; non-ferrous doesn’t.
  • Spark Test: Grind ferrous – long orange sparks; non-ferrous short or none.
  • File Test: Ferrous scratches hard; soft non-ferrous files easier.
  • Acid Test: Hydrochloric acid fizzles ferrous iron out.
  • Spec Sheets: Always check alloy grades.

We eyeball it daily, but lab tests confirm for critical jobs.

Pros, Cons & Real-World Trade-Offs

Ferrous Pros: Strength (high UTS), low cost, easy welding/machining, magnetic for sorting.
Cons: Rust-prone, heavier, needs coatings.

Non-Ferrous Pros: Rust-proof, light, conductive, aesthetic.
Cons: Weaker UTS per weight, expensive, trickier joining.

Trade-offs: Ferrous for budget strength; non-ferrous for maintenance-free. Recycle both — ferrous 100% recyclable, and aluminium saves 95% energy the second time.

Applications: Where Each Excels

  • Construction: Ferrous beams/columns; aluminium windows.
  • Marine: Bronze props, stainless fasteners.
  • Electrics: Copper wire; non-ferrous enclosures.
  • Bespoke: We mix steel frames with brass accents.
  • Auto: Steel chassis (strength); aluminium panels (weight).

Case: Client seaside pergola — stainless ferrous frame + aluminium roof. No rust, light lift.

Maintenance Masterclass

Ferrous: Annual inspect/paint. Galvanised? Rinse salt; touch-up scratches (self-heals minor). Powder coat? Avoid abrasives.

Non-Ferrous: Aluminium — mild soap, no wire wool. Copper — let patina; wax if bare. Brass — Brasso for shine or embrace tarnish.

Pro tip: Humidity-controlled storage for stock. Condensation kills ferrous overnight.

Hybrid builds rise: Steel chassis + Al panels (Tesla style). Non-ferrous 3D-print powders for complex cooling channels. Nano-coatings boost ferrous rust resistance. We’re testing duplex stainless (ferrous/non-ferrous properties) for ultimate gates.

The Bottom Line: Right Metal, Right Job

Ferrous for raw power on a budget — protect it religiously. Non-ferrous for set-it-and-forget-it in harsh spots. Magnet sorts the scrap; specs sort the project.

In our shop, mild steel hauls the heavy loads, aluminium lightens the load, brass polishes the details. Need a ferrous frame with non-ferrous flair? We fabricate seamless hybrids — strong, smart, sorted.

What’s your build? Gates needing grunt? Railings resisting rust? Hit us up — we’ll match metal to mission, cut to size, fitted to last.

RSJ Beams: Innovative Uses in Modern Construction

RSJ beams — or Rolled Steel Joists — are the backbone of countless modern construction projects. These I-shaped steel sections deliver exceptional strength-to-weight ratios, making them ideal for creating open spaces and supporting innovative designs. As bespoke metalworkers, we’ve fitted RSJs in everything from home extensions to commercial fit-outs. Here’s a look at 10 smart ways they’re used today, with real-world examples to show their versatility.

1. Loft Conversions

RSJs excel in loft conversions, removing the need for multiple supporting walls. A single 203×133 UB beam can span 4-6 metres, opening up attic spaces for bedrooms, offices or en-suites.

We recently installed one in a Victorian terrace, supporting the entire first floor while creating a vaulted ceiling. Powder-coated to match the interior, it blends strength with style — no bulky steel posts in sight.

2. Glass Extensions

Full-height glass extensions demand slim, powerful supports. RSJs frame the structure, allowing uninterrupted views and maximum light. Grade S355 steel handles wind loads effortlessly, even on large bifold setups.

For a modern kitchen diner, we used parallel 254×146 beams to carry a glass roof. The result? A bright, airy space that feels bigger than it is, with the steel providing reliable load transfer to foundation pads.

3. Open-Plan Layouts

Knocking through load-bearing walls? RSJs sit neatly above new openings, creating seamless living areas. They distribute weight evenly to pad foundations, avoiding complex steelwork.

In a bungalow renovation, a 305×165 beam spanned an entire room, linking kitchen and lounge. Minimal disruption, quick install — and the exposed beam now anchors downlights and shelving.

4. Rooftop Terraces

Urban rooftops turn into usable spaces with RSJ supports. Cantilevered or framed decks handle planters, decking and foot traffic without overloading existing structures.

A city flat conversion used 356×171 beams to support a green roof with integrated seating. Galvanised for weather resistance, they ensure long-term stability even under snow loads.

5. Cantilevered Features

RSJs enable dramatic cantilevers for balconies, staircases and overhangs. Buried within walls, they project outwards with minimal visual bulk.

We’ve built 3m cantilevered decks using 305×165 sections, complete with glass balustrades. Perfect for modern homes wanting that “floating” aesthetic without compromising safety.

6. Exposed Industrial Interiors

Leave RSJs visible for a raw, factory-inspired look. Primed, painted or waxed, they become design features in lofts, studios and restaurants.

A workshop-to-studio conversion featured exposed 254×146 beams supporting mezzanine levels. Rust-patinated finish adds character, while integrated lighting highlights the steel grain.

7. Modular Construction

Prefabricated buildings rely on RSJs for rapid assembly. Bolt-together frames ship flat-packed, reducing site time and waste.

For a garden office range, we use S275 grade RSJs in modular kits. Precise fabrication means everything slots together — strong enough for full insulation and PV solar arrays.

8. Elevated Walkways and Bridges

Connect buildings or span features like ponds with RSJ walkways. Parallel beams with timber or steel decking create safe, maintenance-free paths.

A private garden bridge used twin 356×171 beams over water, with stainless handrails. Wide enough for wheelchairs, it’s become a daily feature for the homeowners.

9. Retail and Commercial Shelving

Heavy-duty RSJs form the spine of retail mezzanines and display systems. They support racking, counters and walkways without sagging.

In a showroom fit-out, 610×229 beams created a second-floor display gallery. Fireproofed and clad, they doubled the usable space without major structural changes.

10. Sustainable Retrofits

Upgrade older buildings with RSJs for low-carbon strengthening. They replace timber joists or reinforce masonry, extending life without demolition.

A heritage barn conversion used RSJs to support new oak floors. Hidden plates tie into existing walls, blending old and new while meeting modern loading codes.

RSJ Sizes and Specifications

Choose the right RSJ for your span and load:

Size (Depth x Width)Typical SpanCommon Uses
127×76 UBUp to 3mLoft props, light openings
254×146 UB4-6mExtensions, room spans
356×171 UB6-9mTerraces, walkways
610×229 UB10m+Commercial, heavy loads

Grades: S275 for general use; S355 for longer spans or dynamic loads. Always galvanise or paint for outdoor exposure.

Why RSJs Work So Well

RSJs offer high section modulus for bending resistance, low deflection and easy connections via end plates or cleats. Lighter than concrete alternatives, they speed up builds and cut foundation sizes.

In our workshop, we cut RSJs to precise lengths, pre-drill for bolts and apply finishes like intumescent coating for fire protection. This means faster site installs and fewer surprises.

Need RSJs for your project? From loft beams to cantilevered terraces, we supply bespoke metalwork solutions that stand the test of time. Get in touch for a no-obligation span calculation.

Galvanised vs Non-Galvanised Steel: What’s the Difference?

Ever wondered why some steel gates shrug off British rain like it’s nothing, while others turn into rusty skeletons after one wet winter? It all boils down to galvanising — or not. We’re a bespoke metalwork shop who’ve built everything from garden arches to industrial railings, so here’s the straightforward lowdown on galvanised vs plain steel, without the sales pitch.

What’s Galvanised Steel?

Picture this: you take ordinary mild steel and dunk it into a bath of molten zinc at a scorching 450°C. That zinc bonds to the steel, creating a tough, silvery-grey shield that laughs in the face of rust and corrosion.

When rain or damp hits, the zinc sacrifices itself first (clever, eh?), protecting the steel underneath. It’s like giving your metal a lifetime bodyguard — perfect for anything outdoors.

What’s Non-Galvanised Steel?

Non-galvanised is just regular mild steel with no fancy coating. Made mostly from iron, it rusts happily whenever it meets moisture, salt or even sweaty hands. Fine for dry indoor jobs, but leave it outside and you’re asking for trouble.

Think of it as the budget option: strong and weldable, but it’ll need painting or oiling regularly to stay happy.

Head-to-Head: Galvanised vs Non-Galvanised

Here’s how they stack up for real-world projects:

FeatureGalvanised SteelNon-Galvanised Steel
Rust ProtectionExcellent — zinc layer handles moisturePoor — rusts quickly in wet conditions
Best ForOutdoor gates, railings, sheds, framesIndoor shelves, furniture, dry workshops
Lifespan Outdoors20-50+ years with minimal upkeep2-5 years without paint/protection
MaintenanceLow — self-healing coatingHigh — needs regular painting/oiling
CostHigher upfront (about 20-30% more)Cheaper initially
AppearanceShiny zinc finish (weathers to matt grey)Raw steel look (paints easily)
WeldingTrickier (zinc fumes), but doableEasy-peasy

When to Pick Galvanised

Go galvanised for anything exposed to the elements — garden gates, balcony railings, car ports, farm machinery or coastal frames. It’s a no-brainer in rainy UK weather, saving you repaint headaches down the line.

Bonus: scratches heal themselves as zinc migrates to cover them. Low maintenance means more time enjoying your project, less faffing with brushes.

When Non-Galvanised Wins

Stick to plain steel indoors or where you want a custom paint job. It’s lighter on the wallet for workshop benches, internal supports or decorative indoor features. Just keep it dry and give it a protective coat.

A Few Pro Tips from the Workshop

  • Coastal areas? Double down on galvanised — salt air is rust’s best mate.
  • Want colour? Paint over galvanised once it weathers (use primer). Non-galvanised takes paint straight away but needs topping up.
  • Heavy-duty? Hot-dip galvanising (the proper stuff) beats spray-on zinc every time.
  • DIY check: Look for that telltale zinc spangle pattern — genuine galvanised has it.


The Verdict (No Surprises)

If it’s going outside, galvanise it. Plain and simple. Non-galvanised is great value indoors, but pitting rust isn’t worth the saving. Need custom bespoke metalwork that lasts? That’s our wheelhouse — drop us a line, and we’ll sort something tougher than your average shed.

How to Brighten Up Tarnished Metal

Tired of dull door handles, rusty railings, or that once-shiny brass knocker looking like it’s seen better days? Tarnish happens to the best of us — but don’t worry, rescuing it is easier than you think. We’re a bespoke metalwork crew who’ve cleaned more metal than we’ve had hot dinners, so here’s our no-nonsense guide to getting that shine back (without the fuss).

Why does metal go dull?

If you’ve ever looked at a once‑shiny handle, light fitting or garden gate and thought, “That didn’t look that sad when I bought it,” you’ve met tarnish. It’s a thin layer of corrosion where the outer surface of the metal reacts with air, moisture or skin oils and slowly loses its shine.

You’ll see it as:

  • Black or dark brown patches on silver and copper.
  • Yellow, brown or greenish areas on brass.
  • Grey, dirty-looking film on aluminium and steel.

The good news: in most cases, tarnish sits on the surface and can be cleaned off without replacing the metalwork.

Step 1: Figure out what you’re cleaning

Before attacking anything with vinegar, mystery paste, or that old scourer under the sink, it pays to know what you’re dealing with.

Ask yourself:

  • What metal is it? Brass, copper, aluminium, stainless, silver-plated, mild steel – each behaves slightly differently.
  • Is it solid metal or plated? Silver‑plated and thin decorative finishes need gentler treatment so you don’t rub through the coating.
  • Is there a clear coating on top? Some door handles, light fittings and ornaments are lacquered; harsh cleaners can cloud or strip that layer.

If in doubt, always:

  • Test any product or DIY mix on a small, hidden area first.​
  • Start mild and only move up to stronger methods if needed.​

Your future self will thank you for not turning a “quick clean” into “new hardware required”.


Step 2: Start with a gentle clean

Whatever the metal, begin with a basic wash. There’s no point trying to polish through kitchen grease or garden grime.​

  • Mix warm water with a drop of mild washing‑up liquid.
  • Wipe the metal with a soft cloth or sponge to remove dirt and oils.​
  • Rinse with clean water and dry thoroughly with a soft, lint‑free cloth.​

Sometimes, especially on lightly tarnished aluminium or stainless steel, this alone brings back more shine than you’d expect.​


Step 3: Choose the right cleaning method

Now for the fun bit: actually brightening the metal. Below are simple approaches for the most common household metals. Think of it as a menu – pick the one that matches your item.

Brass and copper love to show every fingerprint, but they also clean up beautifully.​

Options:

  • Commercial metal polish:
    • Use a brass/copper polish on a soft cloth.
    • Rub gently in small circles, then buff with a clean cloth.​
    • Great for door handles, decorative items and fixtures.
  • Lemon and salt (DIY):
    • Cut a lemon in half and dip the cut side in table salt.​
    • Rub it over the tarnished brass or copper, letting the mild acid and salt do the work.​
    • Rinse thoroughly with warm water and dry well to avoid water marks.​
  • Vinegar paste for heavier tarnish:
    • Mix white vinegar with baking soda into a thick paste.​
    • Apply with a soft cloth or sponge, leave for a few minutes, then gently rub and rinse.​
    • Ideal for more stubborn patches or intricate details.

Just avoid wire wool or harsh scourers – they can scratch softer metals and leave permanent marks.​

These metals don’t “tarnish” in quite the same way, but they do pick up dullness, stains and light corrosion.​

Try:

  • Mild cleaner first:
    • Use a non‑abrasive cream cleaner or a dedicated stainless/aluminium cleaner.​
    • Apply with a soft cloth following the grain on brushed finishes.
  • Baking soda for marks:
    • Make a thin paste of baking soda and water.​
    • Gently rub onto stains or light tarnish, then rinse and dry.​

For stainless outside (railings, outdoor kitchens etc.), a metal polish with built‑in sealant can both brighten and protect in one go.​

If you’ve got silver cutlery or jewellery that’s gone black in the drawer, there are a couple of easy routes.​

  • Traditional silver polish:
    • Use a silver polish with a soft cloth and work slowly.​
    • Ideal for heirlooms and anything with sentimental value.
  • Baking soda bath (for lightly tarnished silver):
    • Line a bowl with aluminium foil, shiny side up.​
    • Add hot water and a few tablespoons of baking soda.
    • Submerge the silver so it touches the foil; leave for a few minutes.​
    • Rinse and buff dry with a soft cloth.

Avoid aggressive rubbing on silver‑plated items – once you polish through the top layer, there’s no putting it back.​


Step 4: Safety (boring but important)

Metal cleaners and DIY mixes might sound harmless, but they can still irritate skin or damage certain finishes.​

A few simple rules:

  • Wear gloves if you’re using commercial polishes or acidic DIY mixtures.​
  • Work in a well‑ventilated area, especially with strong products.​
  • Never mix random cleaners together – some combinations (like bleach and certain acids) can release nasty fumes.​
  • Keep anything abrasive away from delicate or plated surfaces.​

If something smells like it could strip paint off a car, go easy.


Step 5: Lock in the shine (and slow the tarnish)

Getting metal bright is half the job – keeping it that way is where the real magic is.

For outdoor metalwork:

  • Use a clear protective coat, wax or metal sealant designed for the surface you’re treating.​
  • Products that polish and seal in one step can add months of protection against moisture, salt and grime.​
  • Regularly rinse off dirt and dry surfaces rather than leaving water to sit.​

For indoor items:

  • Wipe down handles, rails and plates with a soft cloth and gentle cleaner as part of normal cleaning.​
  • Apply a light coat of mineral oil or specialist metal oil to brass and similar finishes, then buff.​
  • For decorative metals, microcrystalline wax is a neat way to seal the surface and slow tarnish from fingerprints and air.​

A little maintenance now saves you from a full “weekend of polishing” later.


When to call in the professionals

There are times when DIY isn’t the best idea, even for keen tinkerers.

Get expert help if:

  • The item is historical, antique or valuable.
  • There are signs of deep corrosion, pitting or structural damage rather than just surface tarnish.​
  • You’re not sure what the metal or coating actually is.

And if you decide the effort outweighs the sentiment, that’s where bespoke metalwork comes in – sometimes the best way to “brighten up” tired metal is to replace it with something new, solid and built to last.